WallyScope Calculator
The purpose of this page is to help you calculate your cartridge's dynamic stylus rake angle (SRA) using the WallyScope. This calculator is NOT a replacement for the detailed WallyScope instructions which should be read in their entirety before starting.

It is important to know what type of stylus you have as the measurement process is slightly different for each type.
-
Symmetrical - Most styli fit this description (micro-ridge, line contact, hyper elliptical, elliptical, etc.).
-
Shibata - This is the most difficult stylus to image and will take patience with your illumination
-
Replicant - Easiest to measure
If you have a Shibata or Replicant stylus, skip ahead to the section "Shibata/Replicant Measurement" below.


STEP ONE - MEASURING THE STYLUS GROOVE CONTACT EDGE TO CANTILEVER ANGLE
If your cartridge isn't physically oriented in the camera in the same manner as the photos above, use the software's "Flip" functionality to ensure the visual orientation has the stylus on the left and pointing downward with cantilever rising up to the top right side of the screen.

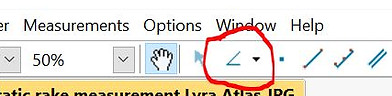
Using the 4 Point angle function, set point #1 at the left side of the cantilever and point #2 at the right side of the cantilever. The third point snap starts near the base of the stylus tip and the fourth ends at the top of the inside edge of the stylus. This is your "Inside Measurement".
Don't worry about perfect placement of the lines yet.
Lay down your second 4 Point angle. Again, start the first point at the left end of the cantilever and set point #2 at the far right of the cantilever. Set point #3 near the tip of the stylus and point #4 at the top of the outer edge of the stylus. This is your "Outside Measurement".
Click on the "handling tool" and do your best to adjust the lines you've just laid down for maximum accuracy.


You now have your first two measurements to enter into the calculator below:
SHIBATA/REPLICANT MEASUREMENT
Use the 4 Point tool as above to measure the relationship between the contact edge and the cantilever. Place point #1 at the left end of the cantilever and point #2 at right end of the cantilever. Point #3 at the bottom of the contact edge and point #4 at the top of the contact edge. Enter this angle in the calculator below under the "Contact Edge to Cantilever Angle" cell.
STEP 2: MEASURING DYNAMIC CANTILEVER ANGLE
Use lowest magnification lens with cartridge mounted to the headshell and lens set perpendicular to the cantilever (or parallel with headshell screws). Lower stylus to the very edge of the WallyScope Trimmed Record. Confirm orientation of stylus/cantilever assembly agrees with this photo. If not, make the change in the "Flip" function.
SLOWLY hand-spin the platter and take a photo while it is moving.
Using the 4 Point angle tool again, set point #1 at left end of cantilever, point #2 right end of cantilever, point #3 at the record level near the stylus and point #4 further to the right of the record surface.
Use the "handling tool" to adjust the lines as necessary. Enter this Dynamic Cantilever Angle into the calculator below
